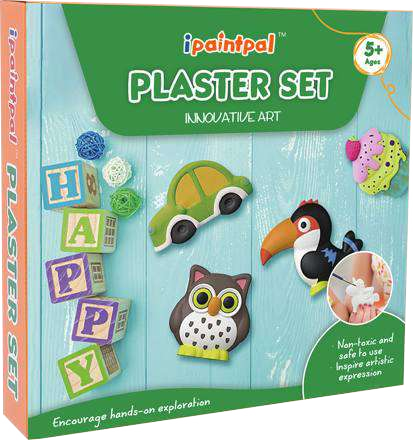
At a glance
A wholesale craft kit should be evaluated as a complete activity, not just a collection of components. Buyers need a controlled contents list, suitable materials, clear instructions, relevant safety documentation and packaging that protects the finished assortment. Sample approval and shipment inspection should check whether the intended customer can complete the promised project with the supplied kit.
Introduction
A craft kit can contain attractive materials and still fail its customer. One missing brush, an unclear preparation step or a broken plaster piece can make the activity difficult to complete. Retail buyers then face complaints about the whole kit, even when most individual components are acceptable.
This makes wholesale craft kit sourcing different from buying paint or accessories separately. The purchasing task includes the experience created by the combination: who the kit is for, what they will make and what they need to finish. This guide provides a practical framework for supplier selection, sample review, packaging approval and shipment inspection.
1. Define the activity before selecting the contents
Review the available DIY craft kit formats, then start with a project description that a customer could understand. Identify the intended user, the finished object and the setting: home activity, supervised educational session, retail gift or another defined use. An attractive theme alone does not explain whether the kit fits that setting.
Describe what “complete” means. Does the kit include every material needed, or must the customer provide water, scissors, protective covering or other items? State these requirements clearly on the product information. Do not call a kit all-inclusive if an essential tool is omitted.
Consider the activity sequence, including setup, application, drying and cleanup. Avoid advertising a fixed completion time until the actual project has been evaluated. Hands-on activity time and time until the finished object can be handled are different measures.
For a first order, prioritize a project that the team can define and review thoroughly. Adding more components can increase pack complexity without improving the activity. A focused kit with understandable instructions may be easier to evaluate and replenish than an assortment built around an impressive item count.
2. Build a controlled bill of materials
Identify every component precisely
A bill of materials, or BOM, connects the project promise to purchasing and packing. Include every component, its quantity, description and identifying reference. For liquids or powders, define the supplied quantity and container. For tools and craft blanks, specify the characteristics that affect use.
“Six paints and one brush” is incomplete if the project needs particular colors and a brush of a suitable size. “Plaster pieces” is insufficient if different shapes have different packing risks or consume different amounts of paint. Describe components well enough that a replacement cannot be approved simply because it looks broadly similar.
Include non-obvious packaging components
The BOM should also cover instructions, inserts, dividers, protective bags, labels and retail packaging. These items may be essential to protecting the product or explaining the activity. Treating them as informal extras makes omissions harder to identify.
Use a revision number and approval date. When a component changes, update the BOM and consider whether instructions, pack weight, carton count or safety review must change too. A photograph can support the list, but it should not replace a readable, controlled component record.
3. Evaluate the supplier’s responsibilities
Ask who sources the craft blanks, who supplies or fills the paint, who prints the instructions and who assembles the finished kit. A trading supplier may coordinate several parties. The important point is whether responsibility and information flow are clear.
Find out who can authorize substitutions. A purchasing team should not discover after shipment that a different adhesive, brush or paint container was considered equivalent without approval. Agree which changes require notification, new samples or a document review.
Request examples of the records the supplier can provide for your order, with confidential information removed where appropriate. A clear pack-out checklist, component specification or traceability record can be more useful than a general promise of strict quality control.
Evaluate communication through a specific question. Ask how the supplier would handle a cracked blank found during packing or a paint container that does not fit the approved insert. The response should identify containment, decision ownership and corrective action rather than only reassurance.
4. Test the complete kit from the customer’s perspective
Use only what the customer is told to use
Review a sample that matches the proposed retail configuration as closely as possible. Open it in sequence, count the contents and follow the instructions using the included materials and clearly declared additional items. Do not quietly borrow a better brush or extra paint from the sample room.
Record where the activity becomes unclear. Look for missing preparation, difficult dispensing, insufficient workspace guidance and steps that depend on knowledge the intended user may not have. A sample can be visually appealing while requiring instructions that are too brief to support the project.
Check quantity against the promised result
Evaluate whether the supplied materials support the advertised project under a reasonable application method. Keep the result tied to the specific sample and method. Avoid converting one successful trial into a universal coverage or completion guarantee.
If several color choices are allowed, consider how that affects consumption. Equal paint quantities may not suit a design that uses one dominant background color. The pack should be evaluated against the actual project options shown to customers.
Separate observation from certification
A complete-kit trial can reveal usability and compatibility issues. It cannot establish that the kit meets every safety requirement. Record practical observations separately from laboratory reports, toxicological assessments and regulatory decisions so none of these records is presented as a substitute for another.
5. Check how materials work together
Paint, blanks, tools and instructions need to function as a system. For a plaster painting kit, assess the blank’s condition, surface preparation and paint application together. A paint that performs acceptably on a prepared board may behave differently on a dusty or highly absorbent craft piece.
Review the application tool supplied in the kit. Brush size, shape and handling should fit the design. Small details may require more control than a broad brush provides. If an additional tool is necessary for the advertised result, include it or disclose the requirement.
Where the project uses layers, glue, decoration or a protective finish, test the intended sequence. Check whether earlier steps must dry before later materials are applied. Unclear sequencing can produce customer complaints that appear to be a product defect but originate in the instructions.
Keep the approved finished sample as a reference for the marketing team. Product photography should show a result achievable through the stated process, with the declared materials. Styling accessories should not imply that excluded components are supplied.
Share your kit concept
Planning a retail or educational craft assortment? Send your requirements to dr.paintpal with the intended user, target market, project theme and proposed contents. Ask for available kit formats and a sample-review scope before finalizing your assortment.
6. Establish the applicable safety requirements early
The product’s intended use, age positioning, materials and destination affect the compliance review. Do not assume that every DIY craft kit is classified the same way or that every component is covered by a single generic report. Packaging and marketing statements can also affect how the product is understood.
For the United States, consult the CPSC toy safety business guidance when the product may be a toy. Applicable testing and certification obligations require a product-specific review. Adult craft supplies and children’s products should not be treated as interchangeable categories.
Paint and other art materials may also require their own assessment and labeling consideration. Match documents to the supplied formulation and intended use. A report for a different color, material or product family needs a justified scope review before it is relied upon.
For European sales, identify the applicable classification and requirements with the responsible importer and a qualified adviser. The European Commission states that the new Toy Safety Regulation entered into force on January 1, 2026, with the new rules applying from August 1, 2030. This transition does not mean that future requirements already apply to every kit today. See the Commission’s transition announcement.
7. Review documents for identity and scope
Create a document register listing the file, issuer, date, identified product and purpose. Check whether the report describes the actual materials and configuration proposed for the order. Ask for clarification when sample photographs or model references do not match.
Confirm that any limitations are understood. A report may cover a defined material or test scope rather than every aspect of the complete kit. A safety data sheet provides particular information about a material; it should not be treated as a universal finished-product approval.
Agree how component changes will be assessed. Replacing a paint formulation, adhesive, decoration or packaging material can affect more than appearance. The person approving a substitution should know when specialist document review is needed.
Keep the reviewed records linked to the approved BOM and artwork. This makes later questions easier to investigate and avoids a common administrative problem: a folder full of documents with no clear connection to the product actually shipped.
8. Design packing around the weak points
Protect fragile and leak-prone components separately
Identify the most vulnerable items first. Plaster pieces can chip or crack; liquid containers can leak; paper instructions can become unusable if exposed to moisture. The packing arrangement should address these different failure modes rather than relying on an attractive outer box.
Evaluate dividers, cushioning and component restraint in the assembled pack. Check whether a brush, cap or hard accessory can contact a fragile surface during handling. A snug fit is useful only if it protects the component without making the kit difficult to unpack.
Review the actual distribution route
Master carton requirements should reflect the planned handling and distribution arrangement. Discuss transport validation with an appropriate packaging or testing provider where needed. Do not claim a kit is transit-proof because a sample survived one informal drop.
Record carton assortment, quantity, markings and any handling instructions. Check whether the retail pack remains presentable after normal unpacking. A kit destined for shelf display may need a different presentation review from one supplied as an inner component of a larger gift assortment.
9. Set up a pack-out check that catches omissions
Packing control begins with a current component list and a clear workstation layout. Ask how components are counted and how incomplete kits are separated. A process should make it difficult to mistake a partially assembled pack for a finished one.
Component counting can be supported by visual references, fixtures or other suitable controls. Finished-pack weight may help detect some omissions, but similar weights and normal variation limit what it can prove. It should not be the only check when missing a component would prevent project completion.
Verify the color assortment as well as the total count. Six containers do not make a correct six-color kit if one color is duplicated and another is absent. Use identifiers that remain understandable under the actual packing conditions.
Record rework and keep rejected components separate. If a defect is corrected, the pack should return through the necessary checks. Uncontrolled rework can reintroduce an omission even after the original issue has been fixed.
10. Make shipment inspection specific to the kit
Provide the inspection provider with the approved BOM, artwork revision, packaging reference and defect descriptions. Agree the sampling plan, acceptance rules and any functional checks before inspection. Avoid leaving the inspector to infer what counts as a complete project.
Check component identity, quantity, visible condition, assortment, instructions, labeling and pack construction. Selected checks may include opening a paint container, examining dispensing or reviewing an application, provided the method and required time are agreed. A short shipment inspection cannot replace a complete safety assessment.
Classify problems according to their consequences. A missing essential tool, unreadable warning and minor print scuff have different implications. Use examples and photographs where possible so buyer, supplier and inspector apply the same interpretation.
Agree what happens if inspection fails. Identify how affected stock is isolated, how the cause is investigated and who approves corrective work. Require appropriate reinspection before shipment release where the agreed process calls for it. A pass should refer to the specified inspection scope, not an unlimited guarantee.
11. Compare cost and scheduling at kit level
Request a quotation for the complete retail kit, including instructions, inserts, protective materials and master cartons. Separate artwork, sample, setup, inspection and freight assumptions. A low component price can hide assembly or packing work that another quotation includes.
Check which component controls the schedule. A custom blank, printed box or document review may take longer than the paint supply. Ask when final approvals are required and whether the stated lead time begins only after all components and artwork are confirmed.
For seasonal assortments, work backward from the required receiving date with a realistic logistics plan. Include time for sample revisions and corrective work where appropriate. Do not assume the same schedule will work for a reorder if the packaging language, contents or distribution route has changed.
12. Keep traceability useful after delivery
Link the finished kit identification to the relevant packing and component records to the extent agreed with the supplier. If a buyer reports a missing color or broken blank, the record should help narrow the investigation instead of treating every complaint as unrelated.
Use a simple complaint record: SKU, lot or shipment reference, issue category, photographs, quantity affected and the action taken. Review patterns before reordering. Repeated breakage may require a packing change; repeated application questions may indicate an instruction problem. Corrective action should address the observed cause.
Frequently asked questions
What should a wholesale craft kit specification include?
Include the intended user and market, promised project, complete BOM, component quantities, instructions, required additional items, packaging, documents and inspection expectations. Add a revision number so samples, quotations and production refer to the same configuration.
How can a buyer check whether a kit is complete?
Count the contents against the approved BOM and complete the intended activity using the supplied and clearly declared additional materials. Record missing tools, insufficient quantities and unclear steps. A component count alone does not establish project usability.
Do all craft kits need the same certificates?
No. Requirements depend on classification, intended age, materials and destination. Review the actual kit with the responsible importer or qualified testing adviser. Do not rely on a generic certificate folder or a report for a different configuration.
Can a supplier replace a component with a similar one?
Only according to the agreed change-control process. A similar-looking component may affect application, packing or documentation. Define which substitutions require buyer approval, new samples or specialist review before production starts.
How should fragile craft pieces be packed?
Use a packing design based on the piece’s shape, fragility and distribution conditions. Review cushioning, restraint and contact with hard accessories in the assembled pack. Validate the proposed arrangement through an appropriate agreed method rather than assuming one standard insert suits every shape.
Is an AI-generated factory photograph evidence of inspection?
No. It can illustrate a concept when clearly labeled, but it cannot demonstrate that a factory, test or shipment inspection exists. Use authorized real records and photographs for claims about the actual order and supplier operations.
Conclusion
A reliable craft kit gives the customer a workable activity and gives the buyer a verifiable specification. Defined contents, complete-kit sample review, relevant documents and protective packing connect the creative idea to the delivered product. Shipment inspection then checks a clear agreement instead of an attractive but ambiguous assortment.
Discuss your wholesale craft kit requirements
Contact dr.paintpal with your target market, intended user, project concept, estimated quantity and packaging preference. Request the current catalog or share a proposed BOM so available formats, samples and documentation needs can be discussed.